Finally! How I Grew My Damaged Hair Thicker
- Rebecca K. Sampson

- Oct 3, 2024
- 6 min read
Updated: Sep 11, 2025

Having long luscious hair has been a dream of mine for years. But after some bad decisions set me back, I had trouble growing my hair without it breaking off at my shoulders.
Now, you are about to see some embarrassing photos of my damaged hair.
While I don't love sharing these pictures of me, I know that dealing with damaged hair is something a lot of women can relate to. If you were like me, you may have felt helpless to fix it. I followed a lot of tutorials, guides, DIY oil treatments, and was consistent with them for a long time before I found what finally worked for me.
My goal with this post is to show you what actually made the difference, based on my experience, so you can have another avenue to try. Hopefully, these tips will also make the difference for you!

My before and after photos are not all in the same outfit, angle, or lighting - because I initially took these just for my own progress tracker rather than for a post. I'm sorry if that makes it harder to see the growth, but once I saw how much happier my hair was, I knew I had to share these tips. Even with it shared imperfectly, you can still see a lot of changes.
First, how did we get here?
From birth to middle school, I had nice wavy hair. It wasn't very thin, but it wasn't very thick either. It did get frequent knots and raggedy ends because I'd sleep with it down (didn't know better at the time), but otherwise I was happy with it.
In high school, I screwed it all up by straightening it daily and dying it red with box dye. For years.
Things improved in college when I got keratin treatments and started using Henna to make my hair red, but once I left school and started working, my patience went out the window and I was using box dye again and the damage really set in.
I'll explain why this damage is only getting better now, after leaving school a decade ago and finally stopping with hair dye three years ago, but first a disclaimer - I am not a hair expert or stylist, all of this information is based on personal experience, and links shown in this post are affiliate links. Some of the products mentioned were gifted to me, but all opinions are my own.
Alright - once your hair has a deep split end caused by damage like over brushing, hair dye, sleeping without your hair in a protective style, or heat - that split will keep moving up your shaft until the hair breaks or falls out from normal shedding.
Even though I stopped dying my hair three years ago and stopped using heat, my hair looked like it wasn't growing, because the hairs kept breaking off at around the same growth point. My hair WAS growing from the top of my head (so is yours), but the breakage keeps that length short.

Now that my hair has a routine that is working for it, I'm able to blow dry my hair again without more of it falling out, while continuing to heal those top layers of my hair that were most damaged.
You can see in the photos, the hair up to my chin is thicker than my ends. It's gotten so much better since I started making these changes in February.
How did I FINALLY fix this? There are a few things I changed this year that made all the difference.
Summary for quick reference - all the details and product examples afterward:
Started using protective styles and products
Started following a hair gurus with a trichologist degree and changing my habits
Created a hair washing routine that involved bond repair products and hair oils
Now let's get into the details of these three changes.
Protective Styles and Products to Prevent Hair Damage
I first started learning about protective styles when I got sew-in hair extensions. I loved having hair extensions and only took them off so that I could save some money for our next house, but I would love to get them again in the future.
While I was on my hair journey, having extensions really helped my confidence, and it taught me to wear protective styles, so that I could protect the investment that was hair extensions. At this time, I started using satin pillow cases and braiding my hair before bed.
Satin pillow cases help prevent moisture loss and avoid friction on your hair, which can contribute to split ends. I love my pink satin pillow case (on sale right now from YANIBEST with a $4 off coupon, at the time of this posting) and have one for my husband too.
Now that I don't have extensions, I still use these protective techniques. Depending on what style I want the next day, I'll use one or two buns (for volume) or braids (more defined waves).
If you have delicate hair, going to bed with your hair down or on a rough pillow can add to that breakage. Especially if you move around a lot in your sleep.
To take this a step further, you can also sleep in a YANIBEST satin bonnet, which will keep your hair from touching anything but satin, no matter how much you move. These are double-layered, so it's not just the outside that is buttery satin. They are pretty cute and come in multiple colors.
Getting New Advice and Changing Habits
For years, I believed that silicones and SLS in products were bad for hair. Based on Abbey Yung's hair advice, I added products with these ingredients back into my routine and saw fast improvements.
Here is an example video from Abbey. I recommend you follow her for more science backed tips.
And I'm not the only one seeing huge benefits from following her tips. Go to any of her videos and read the comments!

On Abbey's advice, I also started washing my hair more frequently and letting go of the "hair training" idea. A dermatologist on Instagram, dermguru, also confirms that hair training isn't helpful, highlighting how oil is genetic.
I haven't locked down my perfect shampoo and conditioner yet, but I'm not shying away from these ingredients as I experiment with a few.
Once I decide which ones I'm going to stick with, I'll update this post.
How Bond Repair Changed My Hair
The biggest impact in my hair has been starting a bond repair product routine. I did not even know what bond repair was until I heard Abbey Young talking about it.
Hair bonding treatments are hair care products that rebuild broken bonds within damaged hair to repair and strengthen it.
While I am still working through making an ideal routine, my pre-wash routine is exactly what I need and making such a difference.
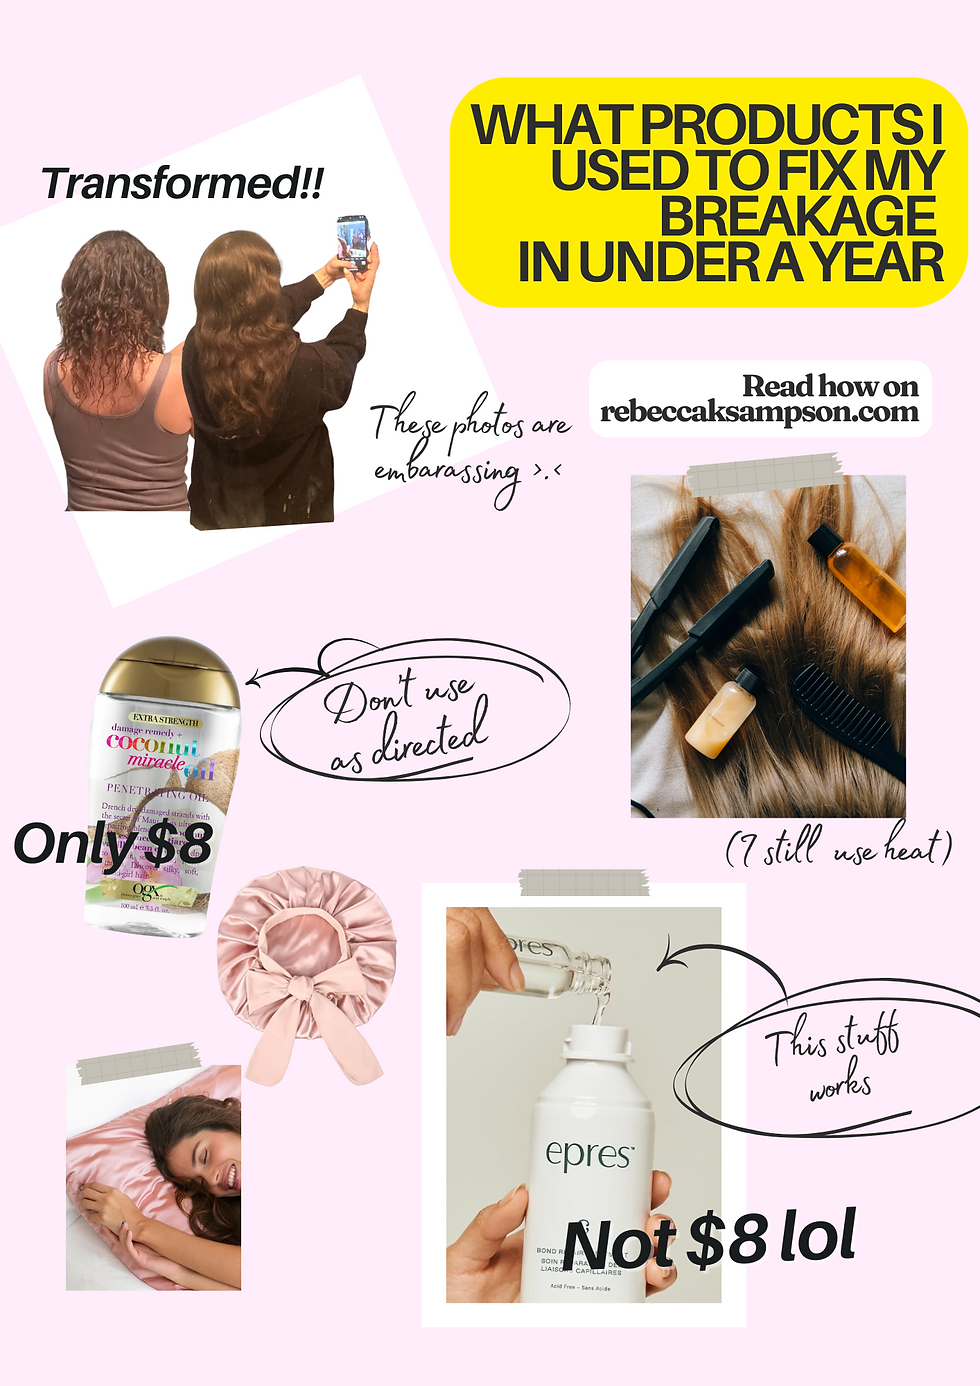
I currently wash my hair three times a week. At least once per week, what I call my pre-wash routine day, I spray my entire hair with Epres Bond Repair Spray and let it sit for at least an hour, then add OGX coconut miracle oil and wait another hour, then wash.
Ideal Shower Routine for Damaged Hair
Step 1: Apply Epres Bond Repair Spray, on each layer of your hair. Wait at least ten minutes (I wait one hour).
Step 2: Apply OGX coconut miracle oil on top of the Epres. Wait at least ten minutes or up to overnight. (This is working as a pre-shampoo treatment and preventing the damage that water in the shower can cause hair. I don't use this product as directed, which is just for adding to wet or dry hair after the shower. I only use it before following my wash day routine.)
Step 3: Shower with a shampoo that has SLS.
Step 4: Condition with a product that has silicones.
Follow Abbey's posts on Instagram or TikTok for why she says proper hair care should involve SLS and silicones.
Ideally, I'd like to use Epres before each wash and build that into every wash day. The website says to keep Epres on for at least ten minutes, but you can also keep it on overnight.

When using Epres, I pay special attention to make sure all my ends are soaked and that I'm working in layers. If you have damaged hair like me, you may notice the top layer is often shorter than the under layers, By working in layers, I make sure to help heal that damage where it's most concentrated.
Epres is said to be for all hair types, and claims their biodiffusion process continues to repair hair even when you've washed it out.
I've been trying new shampoos and conditioners, including some popular bond repair ones, and haven't found one I've liked yet.
Ironically, the L'Oreal Bond Repair works magic on my son's hair. His hair was always tangly and this makes it silky smooth. On me? Not a good fit.
How My Damaged Hair Finally Got Thicker
Now that my hair isn't breaking off mid-shaft on those top layers, that is making my length appear more even and thicker, and it's only getting better each month! I can't wait to see what my hair looks as I refine my products further.
Thanks for sticking with me through this long post! I hope you find helpful tips for your hair journey.
If you liked what you saw, share it on Pinterest, so more people like you can find the post on their hair journey.


Comments